迪亚纳之宝
迪亚纳之宝下载+迪亚纳之宝攻略

攻略概述
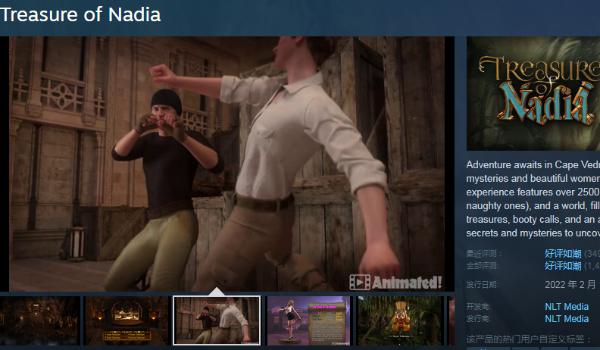
本攻略将详细介绍创世秩序的基础操作、角色系统、剧情推进等核心玩法,帮助新手玩家快速掌握游戏要领,享受这款NLT Media精心制作的RPG神作。
游戏基础操作
创世秩序采用经典的点击式操作方式,玩家通过鼠标点击进行移动、交互和选择。游戏界面简洁直观,主要包括以下几个部分:
主界面:显示角色状态、金钱、物品等基本信息
对话框:显示角色对话和剧情文本
菜单栏:包含存档、设置、物品栏等功能
地图导航:快速移动到不同场景
新手提示
建议新手玩家在开始游戏前先熟悉界面布局,可以通过点击各个按钮了解其功能。游戏支持中文显示,所有菜单和对话都已完整汉化。
角色系统详解
在创世秩序中,你将扮演一名初级侦探,通过与各种角色的互动推进剧情。游戏中包含13位新女性角色,每个角色都有独特的性格和故事线。
创世秩序角色互动场景
角色培养要点
通过对话选择影响角色好感度
完成角色专属任务解锁特殊剧情
收集礼物提升角色关系
探索不同的互动选项
剧情推进指南
创世秩序的剧情围绕谋杀案调查展开,玩家需要收集线索、分析证据、与嫌疑人对话来推进故事发展。
剧情推进步骤
接受调查任务
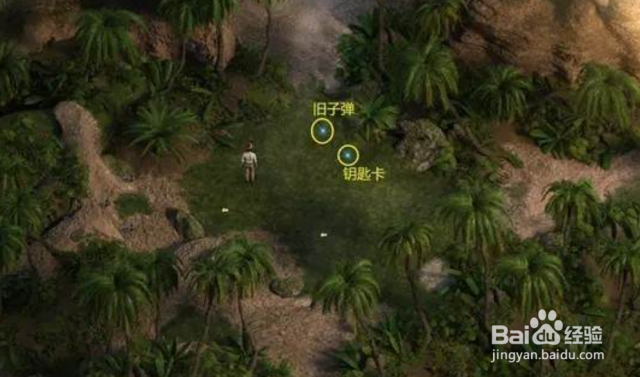
探索案发现场
收集关键证据
询问相关人员
分析线索关联
揭露真相
注意事项
某些剧情选择会影响后续发展,建议在重要决策前进行存档。游戏支持多个存档位,可以体验不同的剧情分支。
作弊功能使用
创世秩序V1.05版本内置了作弊功能,可以帮助玩家更轻松地体验游戏内容。
作弊码激活方法
进入主角卧室
点击左侧床头柜
输入保险箱密码:1998
即可修改金钱和物品数量
使用作弊功能可以获得无限金钱和道具,让玩家专注于剧情体验而不必担心资源不足的问题。
新手常见问题
Q: 游戏卡顿怎么办?
A: 可以在设置中开启低质量模式,或者关闭不必要的后台程序。建议使用PC版本获得最佳体验。
Q: 如何快速提升角色好感度?
A: 多与角色对话,选择正确的对话选项,完成角色专属任务,赠送合适的礼物。
Q: 存档文件在哪里?
A: 存档文件通常位于游戏安装目录的saves文件夹中,建议定期备份重要存档。
第一章:初入北桑蒂瓦
章节概述
主角作为初级侦探来到北桑蒂瓦市,开始新的生活。这一章主要介绍游戏世界观、基础操作和主要角色。
主要任务流程
抵达北桑蒂瓦市,与房东见面
参观新住所,熟悉环境
前往警察局报到
与警长对话,了解工作内容
接受第一个调查任务
创世秩序第一章场景
重要提示
在第一章中要仔细探索每个场景,收集所有可互动的物品。与每个NPC对话可以获得重要信息和背景故事。
关键角色介绍
警长麦克:主角的直属上司,经验丰富的老警察
接待员莎拉:警察局的前台接待,热情友善
房东太太:主角住所的房东,神秘的中年女性
第二章:神秘的案件
章节概述
一起神秘的谋杀案震惊了北桑蒂瓦市,主角作为调查员深入案发现场,开始收集线索和证据。
调查流程详解
前往案发现场 - 豪华别墅
与现场警察对话,了解基本情况
仔细搜查现场,收集物证
询问目击者和相关人员
分析收集到的线索
制定下一步调查计划
重要证据清单
血迹样本 - 在客厅地毯上发现
破碎的花瓶 - 疑似凶器
神秘信件 - 藏在书房抽屉中
指纹痕迹 - 门把手上的可疑指纹
注意事项
在搜查现场时要仔细点击每个可互动的物品,某些重要线索很容易被忽略。建议在进入下一章前确保收集齐全所有证据。
第三章:深入调查
章节概述
随着调查的深入,案件变得越来越复杂。主角发现这起谋杀案背后隐藏着更大的阴谋,涉及神秘组织和超自然力量。
核心任务
调查受害者的社会关系
追踪神秘信件的来源
探索废弃教堂的秘密
与神秘女子接触
揭露邪教组织的存在
创世秩序第三章神秘场景
重要选择指南
是否相信神秘女子的话?
选择"相信":获得重要线索,但可能面临危险
选择"怀疑":保持安全,但错过关键信息
隐藏内容解锁
在废弃教堂地下室找到古老的仪式道具
解开密室的谜题获得特殊奖励
与特定角色达到足够好感度解锁专属剧情
第四章:真相浮现
章节概述
所有的线索指向一个惊人的真相,主角必须面对最终的挑战,阻止邪恶势力的阴谋,拯救北桑蒂瓦市。
最终对决准备
整理所有收集的证据
与盟友制定作战计划
准备必要的道具和装备
潜入邪教组织总部
面对最终BOSS
揭露真相,拯救世界
最终BOSS攻略
确保在战斗前存档
使用收集的特殊道具增强能力
注意BOSS的攻击模式,找准反击时机
善用环境优势和盟友支援
多重结局指南
创世秩序根据玩家的选择和行为提供多种不同的结局。主要影响因素包括:
与主要角色的关系程度
关键剧情选择的结果
隐藏任务的完成情况
收集物品的完整度
完美通关要点
收集要素
收集所有隐藏道具和文物
解锁所有角色的专属剧情

完成所有支线任务
关系培养
与所有主要角色达到最高好感度
解锁特殊互动场景
获得所有角色的专属奖励